
If you run a WordPress site, you might need to block visitors from specific countries.
This could be due to fraudulent orders, spam registrations, regulatory compliance, or simply reducing server load from bot traffic.
Most guides point you toward paid security plugins or complex CDN solutions.
But there are two completely free methods that work just as well for most sites.
In this guide, I’ll show you both approaches:
- Method 1: Custom MU-Plugin (easy and quick solution for most sites)
- Method 2: Cloudflare’s Custom WAF Rules (good alternative if you already use Cloudflare)

Why you might need country blocking
Before we dive into the technical setup, let’s look at common scenarios where blocking countries makes sense:
E-commerce fraud prevention: Certain regions generate disproportionately high chargeback rates or fraudulent transactions. WooCommerce store owners often see patterns of card testing attacks from specific countries.
Spam and bot traffic: Registration spam, comment spam, and malicious login attempts frequently originate from countries where you don’t have legitimate users.
Regulatory compliance: Some businesses need to restrict access based on data protection laws, export regulations, or exclusive licensing agreements.
Server resource management: High volumes of bot traffic from certain regions can slow down your site and increase hosting costs.
Common solutions and their drawbacks
Most WordPress site owners encounter these options when researching country blocking:
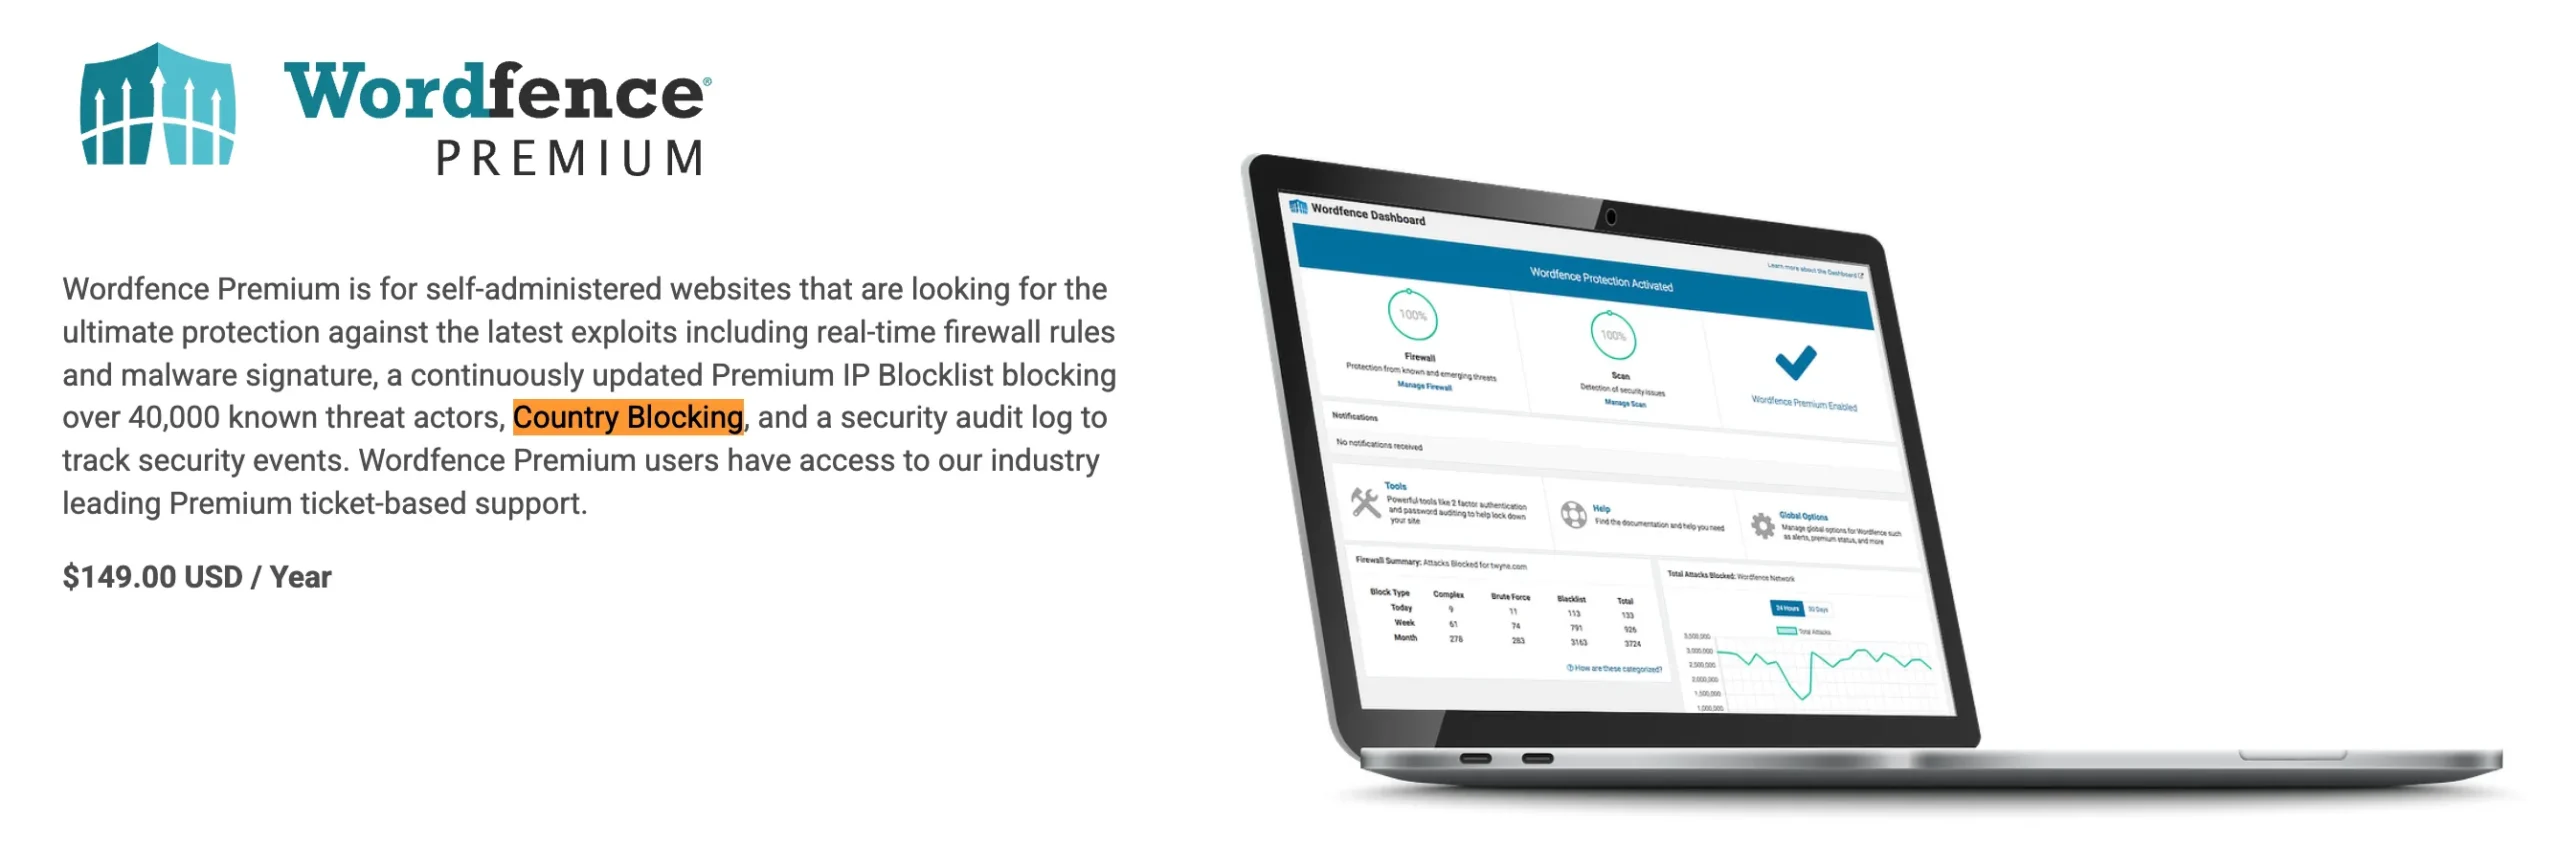
Security plugins like Wordfence and Malcare offer geographic blocking features.
The problem?
Many (Wordfence Premium, Malcare (Pro), and Geotargeting WP) lock this feature behind premium plans starting at $99-$299 per year.
While all Cloudflare plans, including the free tier, technically support country blocking through WAF Custom Rules, the interface requires manual configuration using firewall expressions that confuses users that lack technical knowledge.
The paid plans don’t offer a simpler interface; you’re just paying for more rule capacity (Free: 5 rules, Pro: 20 rules, Business: 100 rules), not easier usability.
Dedicated geolocation plugins exist in the WordPress repository, but they often come with bloated dashboards, unnecessary features, and performance overhead from extra database queries.
Method 1: Free mu-plugin solution
This is the quick and easy solution for most WordPress sites.
It’s a lightweight code snippet that runs as an mu-plugin (must-use plugin) that initializes before regular plugins.

What makes this different
Unlike regular plugins, mu-plugins load before everything else in WordPress.
They can’t be accidentally deactivated through the dashboard, making them perfect for security features that should always stay active.
The snippet I created uses a free geolocation API to identify visitor countries, then blocks access at the server level.
It includes smart caching to minimize API calls and optional REST API protection for WooCommerce stores facing card testing attacks.
Key features
Smart caching system: The plugin stores country lookup results for one hour. This means after checking a visitor’s location once, it doesn’t need to query the geolocation API again for 60 minutes. This reduces API calls by approximately 95% compared to checking every page load.
REST API blocking toggle: WordPress REST API endpoints can be exploited for various attacks. WooCommerce stores particularly benefit from this feature during card testing attacks where bots hammer the checkout API. You can enable or disable this with a simple true/false setting.
Logged-in user whitelist: Your existing customers and members can access the site from anywhere in the world, even if they’re traveling to a blocked country. This prevents frustrating lockouts while maintaining security.
Login page access: The login page remains accessible to everyone. This is critical because without it, legitimate users in blocked countries couldn’t log in to regain access through the logged-in whitelist.
Debug logging: When WordPress debug mode is enabled, the plugin logs all blocked attempts. This helps you identify false positives or unexpected blocking patterns.
Universal compatibility: Works on any WordPress installation, whether you run a blog, membership site, WooCommerce store, or corporate website.
Installation steps
- Copy the complete code snippet from this GitHub Gist
- Access your WordPress site via FTP, SFTP, or your hosting file manager.
- Navigate to
/wp-content/directory. If you don’t see anmu-pluginsfolder, create one. The full path should be/wp-content/mu-plugins/ - Create a new file called
wp-country-blocker.phpinside themu-pluginsfolder and paste the code snippet you copied in step 1. - Edit the configuration variables near the top of the file according to your needs.
- Save the file. The plugin activates immediately. No need to enable it in the WordPress dashboard.
For example, here’s where you edit the blocked countries list:
private $blocked_countries = ['RU', 'CN', 'KP'];Replace these country codes with the ones you want to block, and extend the list if necessary by comma seperated values inside quotes. Use ISO 3166-1 alpha-2 format (two-letter codes). For example:
- Russia: ‘RU’
- China: ‘CN’
- North Korea: ‘KP’
You can find the complete list of country codes on Wikipedia or ISO.org.
Adjust optional settings based on your needs:
private $block_rest_api = true; // Set to false if you don't need API blocking
private $allow_logged_in_users = true; // Keep true to allow traveling users
How it works behind the scenes
When someone visits your site, the plugin grabs their IP address and checks if the country has already been looked up within the past hour (cache check).
If cached data exists, it uses that. If not, it queries ip-api.com to determine the visitor’s country. This free service allows 45 requests per minute, which handles most small to medium sites comfortably thanks to the caching system.
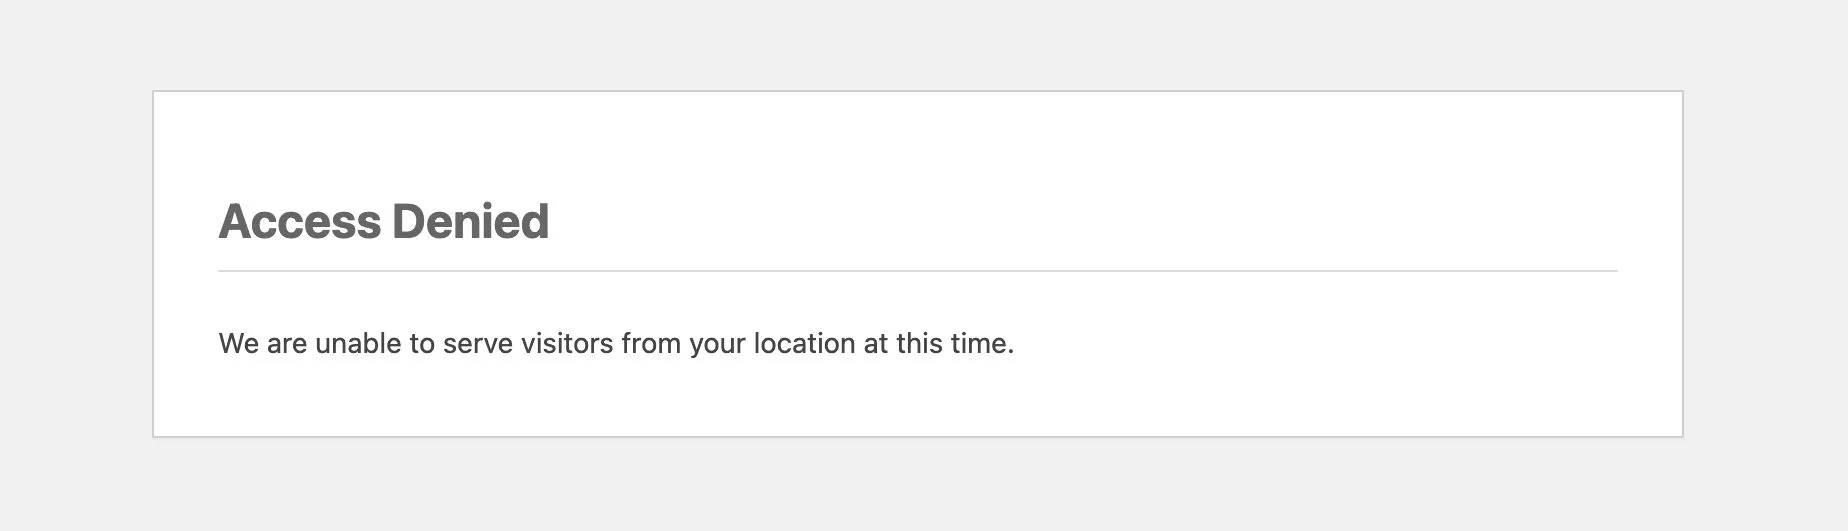
The country code gets compared against your blocked list. If there’s a match and the visitor isn’t logged in, they see an access denied message. If they’re logged in or the country isn’t blocked, they proceed normally.
For REST API requests, the same logic applies, but only if you’ve enabled REST API blocking. This is particularly useful for protecting WooCommerce endpoints from automated bot attacks.
Testing your setup
Testing geographic blocking requires simulating traffic from any of the blocked countries.
Easiest way to test is to block your own country. (Don’t worry, you can always login to your site as login endpoints are not blocked.)
Visit the frontend of your site in an incognito/private browser window. You should see the access denied message.
While keeping your country block enabled, connect to a VPN server in a country you’ve not blocked. I always use Opera browser’s free VPN feature for testing these type of scenarios. Visit your site again in an incognito/private browser window, and you should be able to access it properly.
Using the debug feature of the plugin, you can see and verify the blocked attempts.
Enable WordPress debug mode in wp-config.php:
define('WP_DEBUG', true);
define('WP_DEBUG_LOG', true);
define('WP_DEBUG_DISPLAY', false);
Blocked attempts will log to /wp-content/debug.log. Review this file to see what’s being blocked and from where.
Method 2: Cloudflare free plan setup
If you already use Cloudflare for DNS or CDN services, you can implement country blocking through their dashboard. This method works even on the free plan.
Prerequisites
Your domain must already be using Cloudflare nameservers. If you haven’t set up Cloudflare yet, you’ll need to:
- Create a free Cloudflare account
- Add your domain
- Update your domain’s nameservers at your registrar to point to Cloudflare
- Wait for DNS propagation (usually 24 hours)
Creating country block rules
- Log into your Cloudflare dashboard and select your domain.
- Navigate to Security > Security Rules from the left sidebar.
- Click the “Create rule” and select Custom rules.
- Give your rule a descriptive name like “Block Countries“.
- Set up the rule as follows and hit Deploy.
- Choose
ORif you are adding multiple countries to the rule.

Testing Cloudflare Rules
Cloudflare blocking happens before requests even reach your server, so testing differs from the mu-plugin approach.
Use a VPN to connect through a blocked country and attempt to access your site. You should see a Cloudflare error page rather than your WordPress site.
Check Cloudflare’s Security Events by clicking the stats number next to your rule name to see blocked requests in real-time. This helps verify the rule is working and shows you what traffic is being stopped.
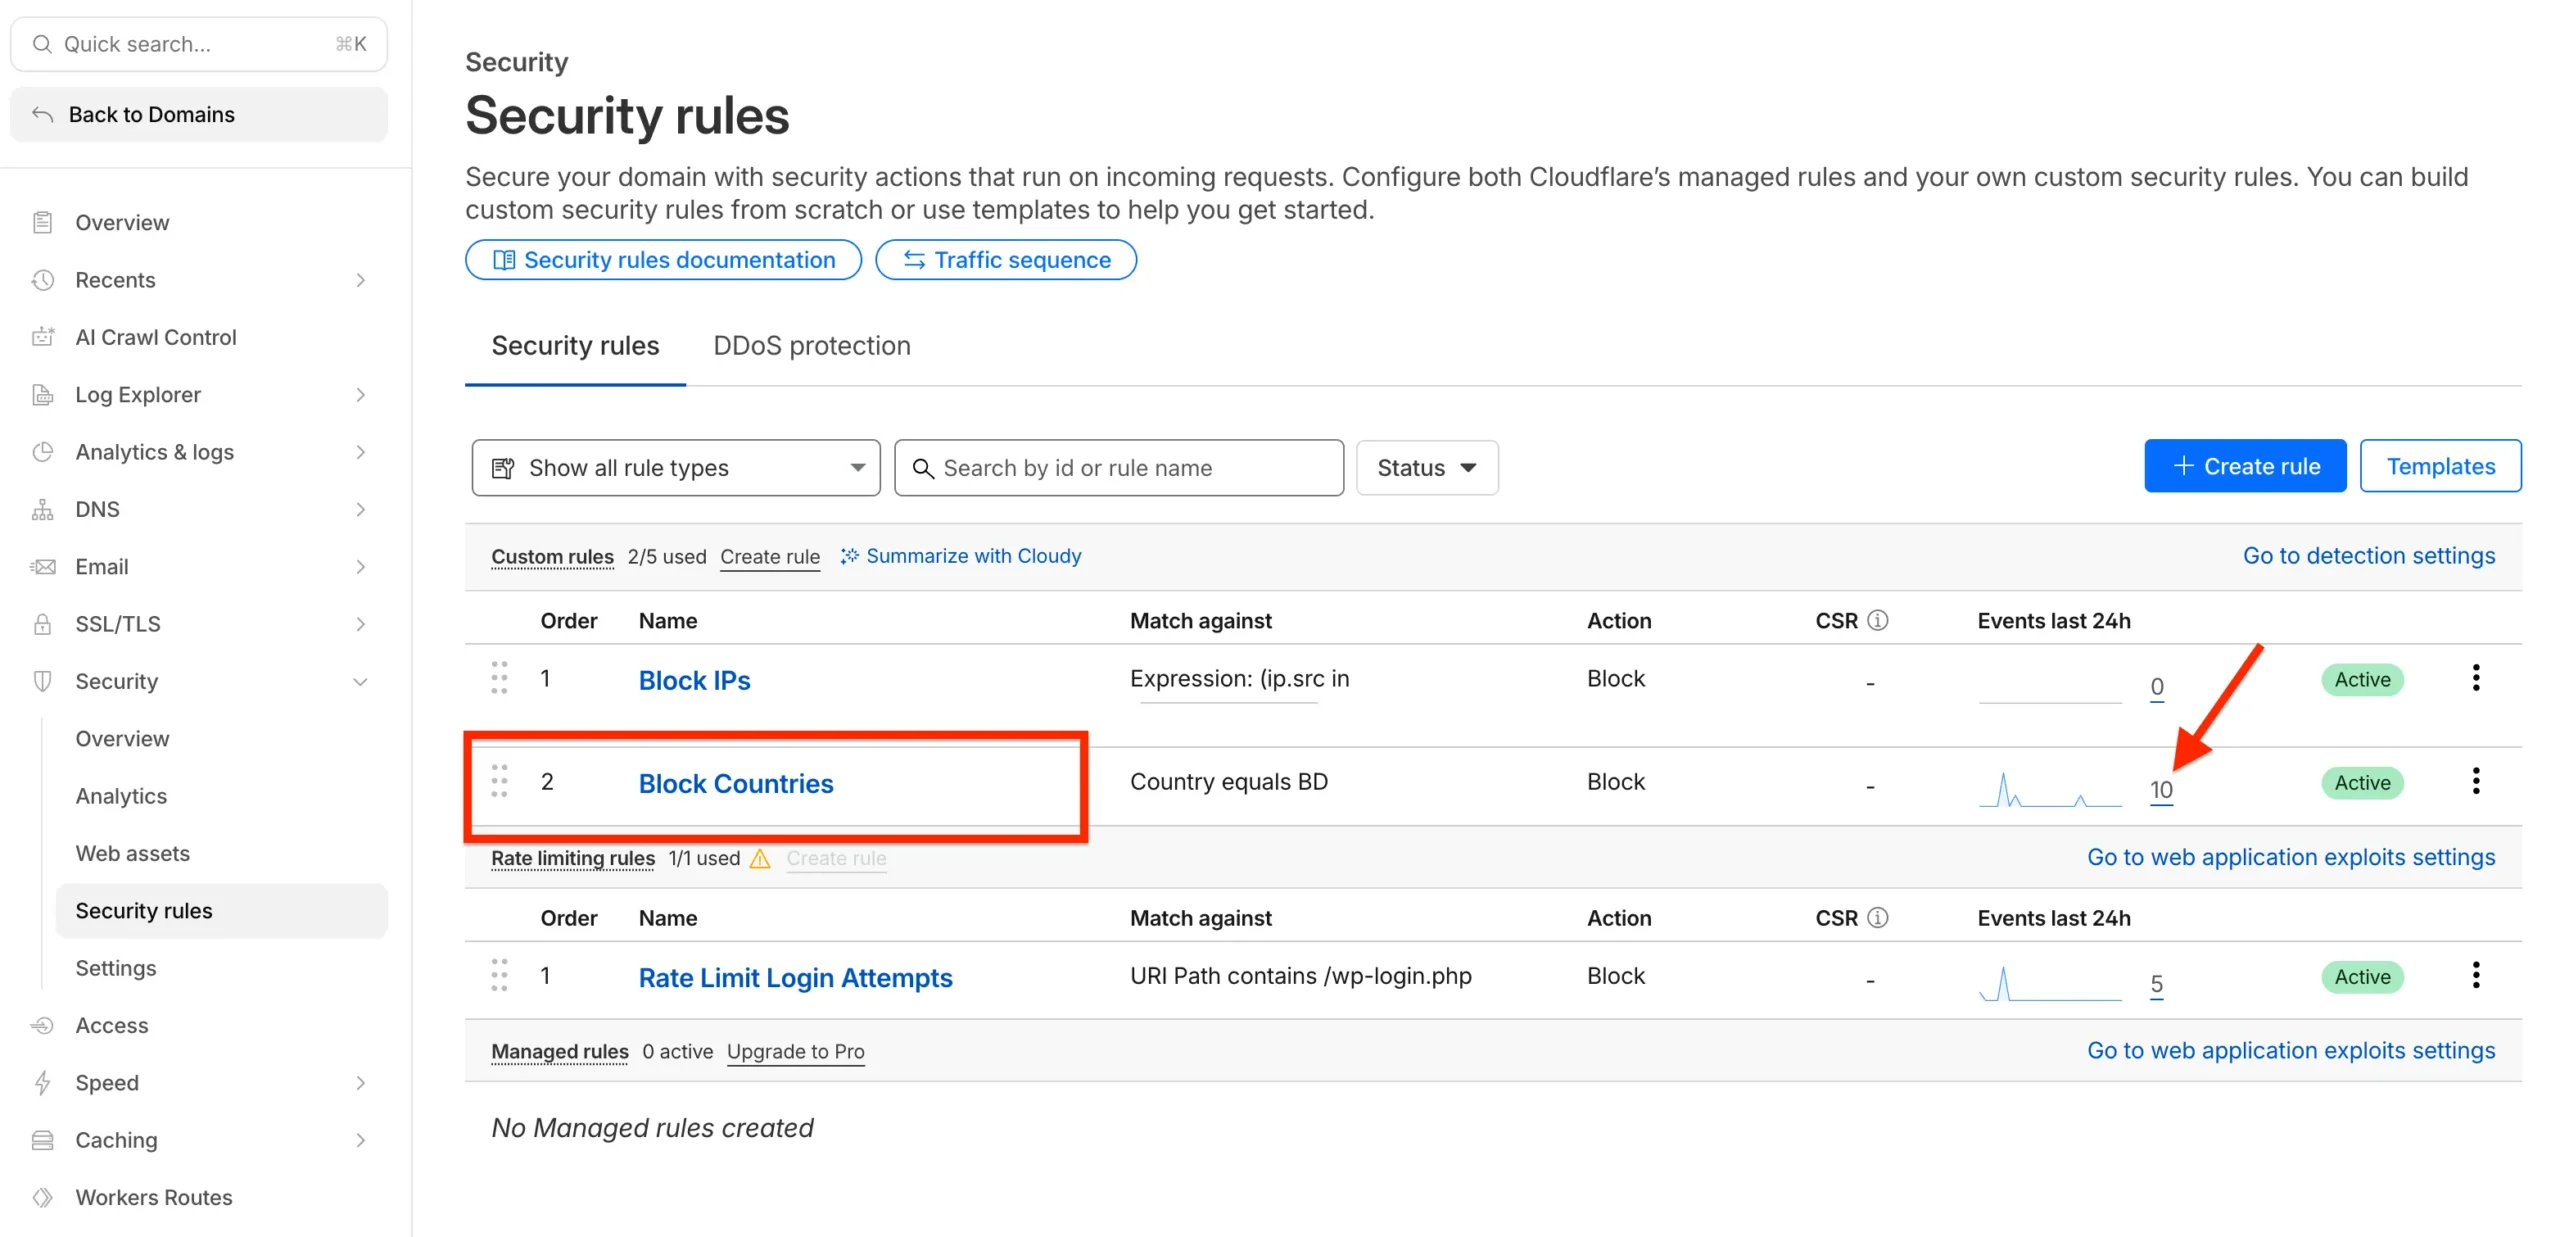
You can add more custom rules to block certain IPs or rate limit access to /wp-login.php as seen in the screenshot.
These will protect your site from malicious users and bots who consume unnecessary server resources and slow down your website.
Cloudflare vs mu-plugin comparison
Cloudflare advantages: Blocking happens at the CDN level, so malicious traffic never touches your server. This saves server resources and bandwidth. The firewall rules apply to your entire domain instantly.
Cloudflare limitations: Requires changing nameservers, which some people prefer not to do. The free plan limits you to 5 custom rules total (you can add as many countries as you like into a single rule). Configuration happens outside WordPress, requiring separate dashboard access.
MU-Plugin advantages: No external service dependencies. Everything controlled within your WordPress installation. No rate limits beyond the geolocation API. Works with any hosting setup without nameserver changes.
MU-Plugin limitations: Blocking happens at the PHP level after the request reaches your server. Uses minimal server resources but not zero. Requires file-level access (via FTP or File Manager of your host) to install and configure.
Common questions
Will this affect my SEO?
No. Search engine bots like Googlebot typically originate from the United States and aren’t affected by country blocking. If you accidentally block a country where Google has data centers, you might see crawling issues. Stick to blocking countries where you have no legitimate business presence.
Can users bypass this with VPNs?
Yes, VPNs allow users to appear as if they’re from different countries. However, most malicious actors and bot networks don’t bother with VPNs for basic attacks. For sophisticated threats, you’d need additional security layers anyway.
What happens to existing users from blocked countries?
If you enable the logged-in user whitelist (recommended), they can still access your site after logging in. The login page remains accessible, so they can authenticate and regain access.
Does this slow down my site?
The mu-plugin adds minimal overhead. After the first lookup, country data is cached for an hour. Most visitors experience zero performance impact. Cloudflare blocking actually speeds up your site by reducing server load from blocked traffic.
Can I block multiple countries?
Yes, both methods support blocking as many countries as needed. The mu-plugin uses a simple array, while Cloudflare lets you add countries to the rule expression with or statements.
Conclusion
Country blocking is a practical security measure for WordPress sites dealing with targeted attacks, spam, or compliance requirements. You don’t need expensive plugins or complex enterprise solutions to implement it effectively.
The free mu-plugin solution I’ve shared handles the vast majority of use cases. It’s lightweight, reliable, and gives you complete control over your blocking logic.
For sites already invested in the Cloudflare ecosystem, their free plan offers a robust alternative. I use it for most of the projects I work on.
Start with conservative blocking. Monitor your debug logs or Cloudflare events for a few weeks. Adjust your blocked country list based on actual attack patterns rather than assumptions.
Remember to enable the logged-in user whitelist if you have customers or members who might travel internationally. This prevents frustrating lockouts while maintaining the security benefits of geographic blocking.
Have questions or need help with implementing country blocking on your WordPress site?
Reach out using our contact page or through the live chat widget below. One of our WordPress Experts will reply shortly.


